Towards faster & safer billet inspection
In this presentation, Gavin Dao discusses how current innovations in new advanced phased array hardware can be applied for Titanium and Nickel Alloy Billet Inspection.
Gavin discusses the benefits of larger channel counts, faster data rates, and new advanced techniques like Full-Matrix Capture (FMC), Total-Focusing Method (TFM), Plane Wave Imaging (PWI), & Phase Coherence Imaging (PCI) for this inspection.
Overview, background and challenges of Billet inspection
Billet Inspection in Aerospace is vital for safety, especially in parts for jet engines. The materials in focus are Titanium alloys (e.g., Ti-6Al-4V, or Ti64) and Nickel alloys, common in manufacturing rotating parts for jet engines.
Titanium (e.g. Ti-6Al-4V, also referred as Ti64) and Nickel Alloys are common materials used in manufacturing of rotating parts for jet engines. Ti64 is known for “noisy” signals due to complex grain structures, making inspection challenging.
Nickel is considered “cleaner” and presents fewer inspection challenges. As a consequence, the Reject Criteria differs between Titanium and Nickel due to their structural differences.
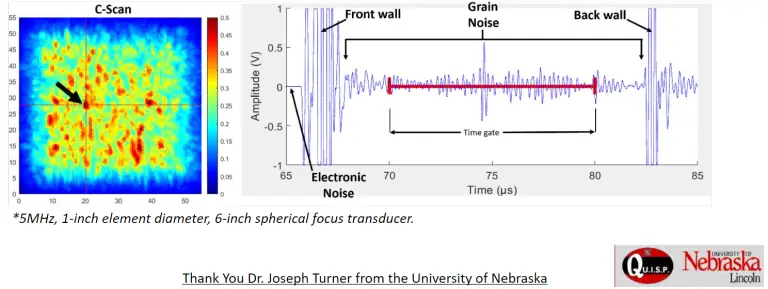
Manufacturing Process and Intermediate Inspection
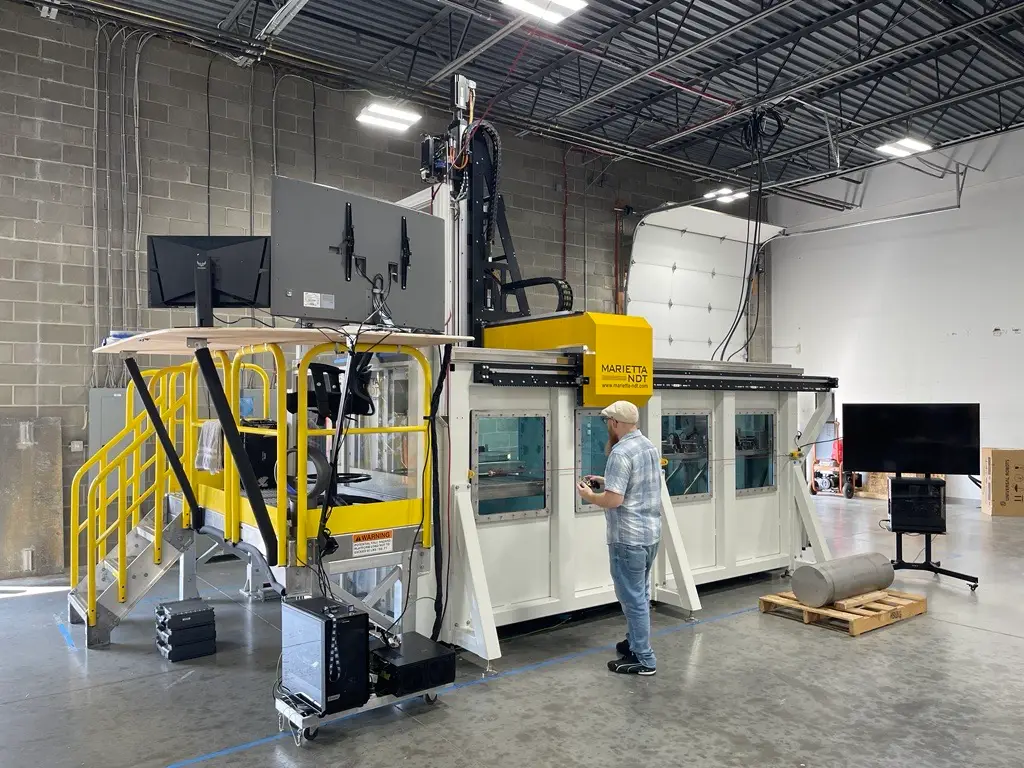
Billets: These metal bars are cut into smaller pieces, forged into an intermediate “sonic shape” for inspection before final machining into airplane parts.

Current Methods and Innovations
- Conventional UT:
- Typically, billet inspection is done with conventional UT
- Limitations: Slower due to reliance on mechanical accuracy and movement.
- Phased Array UT:
- Benefits: Angle steering enhances accuracy.
- FMC/TFM:
- Advantages: Higher resolution and speed, without compromising quality.
TPAC’s Approach to Billet Inspection
- Hardware Setup:
- Linear Array Probes: Typically 1 to 128 elements cover marked regions on a billet cross-section. The probe is rotated to capture complete data.
Productivity Benefits with Linear Probes:
- Larger Coverage: Linear probes cover a broader beam section than conventional UT, reducing the need for multiple scans.
- Mechanical Setup:
- Initial setup includes rollers; newer setups are designed for improved stability and precision.
Phased Array & FMC Ultrasound Instrumentation
-
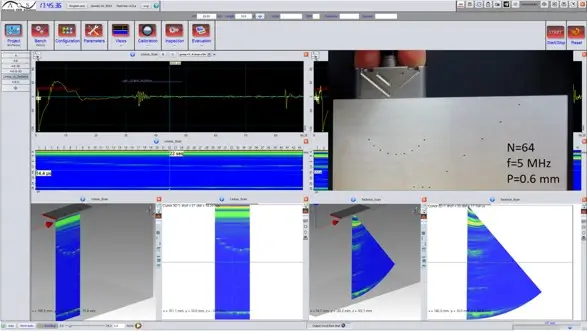
Instrument Used: Pioneer with FastView software.
- Flexibility: Customizable layouts for probes, groups, instruments, and data views, lockable for repeat use in production settings.
- Enhanced Reporting: Adjustable to industry needs, making data interpretation simpler for operators.
- Data files can be exported to 3rd party tools for analysis (e.g. CIVA Analysis, NDT Kit/ULTIS).
- Supports multi-instrument integrations: Pilot, Explorer, Pioneer
FURTHER Advanced Techniques for billet inspection:
Benefits of PWI, Surface Adaptive Methods, PCI
Surface Adaptive Techniques:
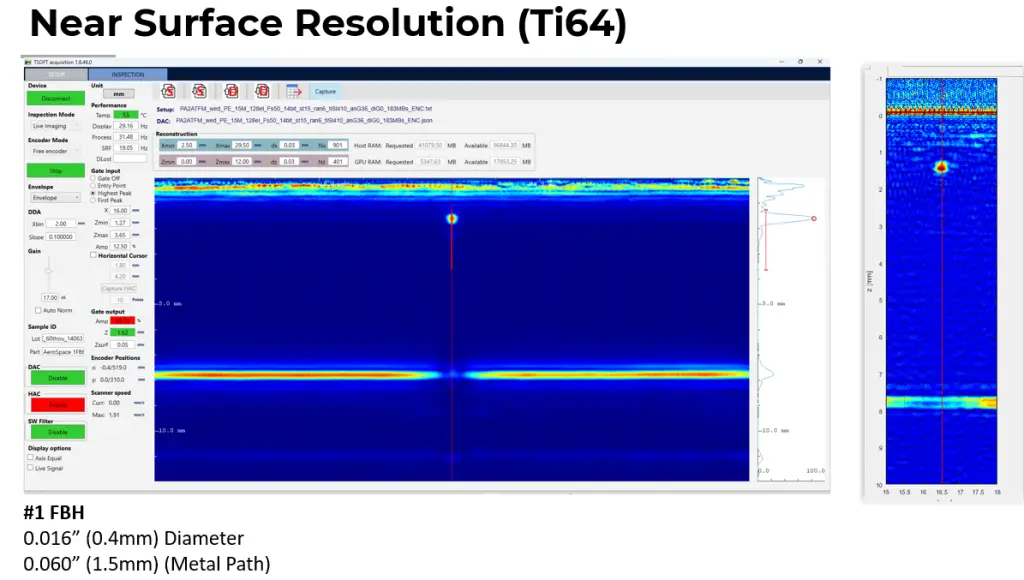
By redrawing the profile from water-coupled shots, the focus adjusts based on the interface echoes, enhancing precision near surfaces.
Comparison: Standard TFM vs. Adaptive TFM
- Near-Surface Resolution: Adaptive TFM offers improved resolution closer to the surface.
- Uniform Sensitivity: Enhanced visualization across depths in both vertical and horizontal grids.
Plane Wave Imaging (PWI):
- Strategy: Receive all signals in individual buffers, allowing selection of multiple angles.
- This method reduces data size, speeds up processing, and minimizes storage requirements.
- Shows the depth as we go deeper on vertical and horizontal grid
Data Acquisition and Speed with Adaptive PWI
- For a 20-foot billet with 80% overlap, inspection can be completed in ~30 minutes.
- In traditional setups, this could take several hours to a full day.
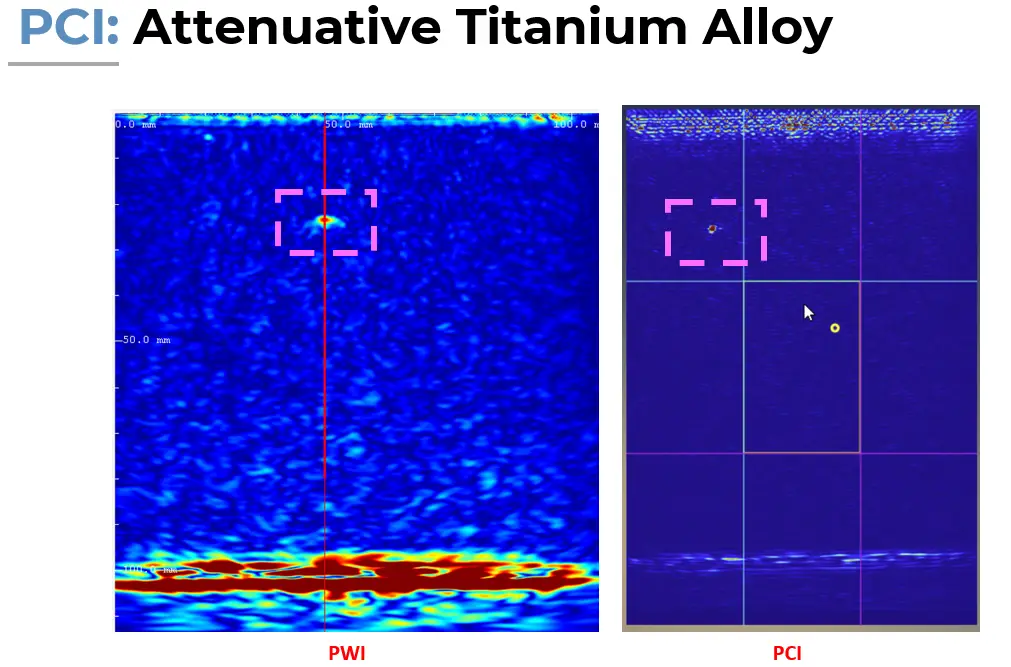
Example with Phase Coherence Imaging (PCI)
- Application: Demonstrated on an attenuative titanium plate to enhance clarity and resolution at different depths.
Conclusion
Benefits: High-Speed TFM-based Methods for Titanium and Nickel Alloys Billet Inspection provide:
- Better sensitivity
- Improved SNR (Signal to Noise Ratio)
- Faster inspection times


